

The EZ Flash Omega is a newly released GBA flashcart that is capable of playing GBA, GB, GBC, and NES ROMs. This is a tutorial on how to set up the flashcart and in depth guide on how to use its many features.
Contents
Requirements
- Micro SD card (up to 128 GB supported)
- Micro SD card reader/adapter
- EZ Flash Omega Flashcart
- eBay sellers (sometimes cheaper)
- Visit the official EZ Flash Omega download site and download the following for the EZ Flash Omega:
- Kernel/Firmware
- Cheat Library
- Thumbnails Pack
Choose your flashcart case (optional)
The EZ Flash Omega comes with two case sizes to fit your console.
- A regular case that fits flush against GBA/DS Phat consoles (default configuration)
- A mini case that fits flush against NDS Lite consoles

To change case configuration
- Place the flashcart down on a hard static-free surface with the back plate facing up
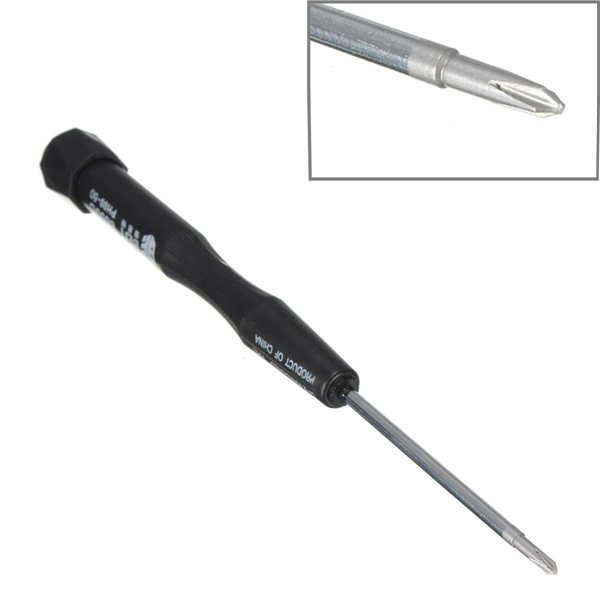
- Locate the one screw holding the back plate in place and remove it with a small Phillips head screwdriver (example)
- Remove the back plate and the EZ Flash Omega chip
- Choose your desired front plate
- Put back plate, EZ Flash Omega chip, and front plate together, making sure everything is aligned properly.
Please make note of the small cutout for the Micro SD card slot. - Install the small screw on the back of the flashcart.

Set up your Micro SD card
1. Use your operating systems tools to format your Micro SD card using the table below.
| Card Size | Filesystem | Cluster Size |
| ≤ 2GB | FAT/FAT16 | 32KB |
| ≤ 32GB | FAT32 | 32KB |
| ≤ 128GB | exFAT | 32KB or Larger |
Alternatively, you can use the offical SDCard.org formatter tool here or this FAT32 Formatter tool.
After your Micro SD card is in the proper format and cluster size, you will need to place some files on it.
2. Download the EZ Flash Omega kernel, cheats, and thumbnails and extract the .zip archives to the root of your Micro SD card. Your Micro SD card should look like the image below.

3. Place GBA/GB/NES ROMs anywhere on the Micro SD card. Yes with the EZ Flash Omega it is that simple! No patching necessary! I decided to organize my ROMs by console in their own folder.
4. Remove the Micro SD card from your computer and insert it into the EZ Flash Omega.
Update the EZ Flash Omega kernel
On the first boot of your EZ Flash Omega flashcart or when a new kernel version is released, it is necessary to perform an update of the kernel/firmware.

1. Insert the Micro SD card into the EZ Flash Omega
2. Insert the EZ Flash Omega flashcart into your GBA/NDS/NDS Lite
3. BEFORE turning on your GBA make sure you are holding down the RIGHT trigger button. Also, for good measure, plug your GBA into a secure power source (wall outlet).
4. Turn on your GBA while holding down the RIGHT trigger button, do not turn off your GBA until the EZ Flash Omega kernel has been installed.
5. After the update process is done, reboot the console. The new firmware needs the game console to be rebooted in order take effect.
6. Your firmware and kernel version is displayed in the upper right corner of the System Settings menu.
Usage Guide
This section of the tutorial will go in depth on how to use the EZ Flash Omega flashcart and its many features.

Saving a game
After saving in a game you MUST wait 5 seconds before returning to the kernel interface or powering down your console. If this is not done, you risk losing your save data.
Wait 5 seconds after:- Saving using in-game save functions
- Saving using game states
- Pressing L+R in the NES/GB/GBC emulator
After waiting 5 seconds you are safe to power off console or return to the kernel interface.
- Press the L and R trigger buttons to switch between the SD Card, Norflash, System Settings, and Help menus
- Press A on a folder to go into a directory or on a game file to display the launch menu
- Press UP or DOWN buttons to select different options or files. Press A to confirm or B to dismiss/exit.
- Press LEFT or RIGHT buttons to switch pages in the file browser
Hotkeys
The following hotkeys only work in the SD Card file directory menu.

Game Thumbnails
Press the SELECT button to toggle GBA game thumbnails. The loading speed of thumbnails depends on the speed of your Micro SD card.

Recently Played Games List
Press the START button to view a list of recently played games.
Delete File
Navigate to a file and press L + START to confirm deletion of that file. Use this at your own risk.
Multiboot
Multiboot allows a game to be launched with the GBA bios loaded. This is used for GBA link play or connecting to some GBA accessories. To use this mode, press A on a game to display the launch menu, select CLEAN BOOT, then press L+A to use multiboot.

Launch Menu
This popup menu appears when you attempt to launch a game.
- Clean Boot
- Select this option to boot the game without any addons. Then, press L+A if you wish to use the Multiboot feature (this feature explained above).
- Boot with Addon
- Select this option to boot the game with the addon functions that are enabled in the System Settings.
- Write to NOR Clean
- Select this option to write the selected game to the 512Mb NORFLASH without any addons.
- Write to NOR Addon
- Select this option to write the selected game to the 512Mb NORFLASH with addon functions that are enabled in the System Settings. Cheats must be selected before writing the game to NORFLASH and cannot be changed after being written.
- Save Type
- Unless you are using fan translated games or ROM hacks, this setting should be set to AUTO. Otherwise, use the LEFT and RIGHT buttons to select the save type required.

Cheats (and how to add more)
This function only works and is visible if:
- You have the CHEAT folder on your Micro SD card’s root directory
- You have cheats for your specific GBA game
- You have cheats enabled in the System Settings menu
The cheat library provided by the EZ Flash Team is collected from the internet. There may be more or better cheats for your game. I suggest taking a look at this GBA cheat database (mirror) as well as other resources on the internet.
You will need to rename the .CHT file to your GBA games filename and place it in the CHEAT folder. For example, if your GBA game is “minishcap.gba”, you will need a “minishcap.cht” file in your CHEAT folder.
Once in the cheat menu for your game, use the UP and DOWN buttons to select a cheat then press the A button to toggle it. The LEFT and RIGHT buttons are used to navigate to the next page.
Once done selecting cheats, press the B button. Select “BOOT WITH ADDON” option and press A to launch the game with cheats.
During the game, press the L+R+START buttons to display the in-game menu. Select “CHEAT ON” or “CHEAT OFF” to toggle cheats on/off.

In-game Menu
When playing a game with the “BOOT WITH ADDON” function, press L+R+START to access the in-game menu. The options in the menu are dependent on which addons are enabled in the System Settings menu. Press the UP or DOWN buttons to select a function and the A button to confirm it.
The hotkey to access the in-game menu can be changed in the System Settings menu.
- RESET
- Go back to the kernel interface. If the RESET addon is the only addon enabled in the System Settings menu, the in-game menu hotkey will be the RESET hotkey.
- SAVE/LOAD
- Save or load game states from the RTS folder on the Micro SD card.
- At the time of writing this guide, this feature can be very buggy.
- CHEATON/CHEATOFF
- Enable or disable the cheats that were selected before booting the game with addons.

NORFLASH
If a game is written to the 512Mb NORFLASH, it will appear in this menu.
- DIRECT BOOT
- Launch the game as it was written to the NORFLASH. If it was written as “CLEAN BOOT” it will launch clean. If it was written as “WRITE TO NOR WITH ADDON”, it will boot as “BOOT WITH ADDON”.
- DELETE
- Select the last game on the list and choose this option to delete the game from NORFLASH.
- FORMAT
- Erase the entire NORFLASH. It will take about 4 minutes, use it with caution.

System Settings Menu
In this menu you can change useful options as well as see the firmware and kernel version in the upper right corner of the screen.
- TIME
- Change the time/date for games that use Real Time Clock (RTC) features, such as the Pokemon games.
- The small battery on the EZ Flash Omega chip is used to keep track of RTC
- ADDON
- Select the addons you want to use in the in-game menu.
- LANGUAGE
- Set the language for the kernel interface
- FAST PATCH ENGINE
- This option is on by default. Unless you are having issues playing a heavily modified ROM such as a fan translated ROM or ROM hack, leave this enabled. Turning this option off will use the manual patch engine and patching time will be increased.
- SLEEP HOTKEY/IN-GAME MENU HOTKEY
- Change hotkey for sleep mode and in-game menu. For sleep mode, wake the console by pressing SELECT+START (not modifiable). DO NOT use keys that can’t be pressed at the same time (such as UP+DOWN).
EZ Flash Omega Review
Thanks to the EZ Flash team, I received a review copy of this flashcart. Check out my in-depth review of the EZ Flash Omega here.